Sunday, January 27, 2013

Beetnik Cake!


Here is the real thing...beetnik cake!  My husband and kids love it.  And, I think I've found a way to get more fiber and folic acid in my diet:)

A brief history...

In case you have not read my last post, this quest to find a recipe for beetnik cake starts with my husband.  He has very fond memories of a chocolate cake with white frosting, made in the cafeteria of Midway School, in Fellows, California, that he calls beetnik cake.  We've never ran into anyone else that has any idea of what he is talking about.  So, a couple of weeks ago, I found a "beat n bake cake" recipe, that I surmised was the cake he had mistakenly heard referred to as "beetnik cake".  Before baking this Pillsbury recipe, I googled beetnik cake and found several recipes with beets in it, and dismissed this as a weird coincidence.  Surely no cafeteria in America would bake beets into a chocolate cake!
I was corrected by my best friend's grandmother.  Tootsie is a wonderful woman who spent a lot of years cooking in the cafeteria of North High School.  She informed me that she used to bake beetnik cake, and that indeed many schools used beets in their cakes...."How else do you think we would get those kids to eat their vegetables?"
So, I looked through the recipes again and baked up a true beetnik cake this afternoon.

Beetnik Cake

1 1/2 C well drained & mashed cooked beets
1 tsp vanilla
1 1/2 C white sugar
1 C vegetable oil
3 eggs
1 3/4 C all purpose flour
1 1/2 tsp baking soda
1/4 tsp salt
6 Tbsp unsweetened cocoa powder

Preheat oven to 350 degrees and grease and flour a 13x9 pan.  Most recipes direct the pan to be greased and floured, but I don't like the look or the taste of that thin layer of flour on the outside of the cakes, so I just spray the pan with cooking spray, and have never had a cake stick to the pan.  With bundt cakes or other such cakes that won't be frosted, I grease and sugar the pans, so the outside of the cakes are still pretty and tasty.

I bought 1 can of beets, thinking that this would be enough for 1 1/2 C of mashed beets.
As you can see, I bought the generic brand found at Winco.  Tootsie told me they used the canned beets they received from the government and the cakes always tasted moist and delicious.  My mother in law has told me on several occasions that the government issued canned foods were of very good quality.  Anyway, the point is, you don't have to spend a lot on name brand beets.  However, you will need more than 1 can.  This can only amounted to 1 cup of smashed beets.  I did not run out to the store to get another can when I realized I was short.  I just baked the cake with 1 cup of beets rather than the 1 1/2 cups the recipe calls for.  Not sure it made a real difference?
Now, mashing these beets was not the easiest task.  Knowing that I didn't want to have to clean up beet juice from a lot of appliances, bowls, utensils, etc, I thought the easiest way to mash these would be to chop them up first and then mash with my potato masher.  Wrong.
Although they are softened, they are not easily mashed.  So, I had to drag out my mini processor.  This did the trick, quickly.
Next, I mixed this cup of mashed beats with the eggs, vanilla, oil, and sugar.  It sure looked pretty...
Then I added the flour, cocoa powder, baking soda, and salt, which I had mixed together in a separate bowl.
Then I poured it into the prepared pan, and put it in the preheated oven, and baked it for 25 minutes.
It was still a little wet on the toothpick when I checked it after 25 minutes, so I set the timer for 3 more minutes.  It was done and smelling chocolately after 28 minutes.  I set it out to cool before I frosted it.
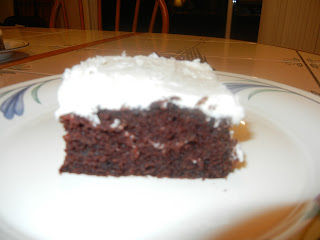
I frosted it with a simple vanilla buttercream because my husband remembers it with white frosting.  However, I think any frosting would taste good on this...chocolate, mocha, or peanut butter comes to mind.

Vanilla buttercream frosting

3 C powdered sugar
1 tsp vanilla
1/4 C softened butter
4-6 Tbsp of half & half (I always use half & half when the frosting recipe calls for milk)
Mix it till smooth, adding more cream if too stiff to spread.  Then frost the cooled cake.

The finished cake is moist, chocolaty, and delicious.  We did not taste the beets at all, nor does the cake have a red tint.  This dessert was easy....and may find itself in my usual rotation.  The aroma of this cake baking in the kitchen this afternoon, kept my mind off the fact that we have a full week of school starting tomorrow morning, with more than 2 weeks until our next holiday...and that's good therapy.
Monday, January 21, 2013

Beetnick Cake?

My husband has very fond memories of something he calls "beetnick cake".  It was a single layered chocolate cake, with white frosting that was served in the cafeteria of Midway School, in Fellows, California.  He's asked me several times if I remember this cake (although I did not go to Midway School), he asks friends if they remember this cake (none of whom went to school with him either), and every time we're at a deli or restaurant serving a chocolate sheet cake with white frosting, he will ask if it is beetnick cake.  We have yet to run into a cake with that name.
Over the three day weekend, the sun was shining in through the sliding glass door of our kitchen, and I felt like cooking something up for my husband.  I pulled out an old Pillsbury cookbook. Published in 1969 - the year of my birth!  And, might I go off on a tangent for just a minute to exclaim how much I love and treasure old cook books!  They have a wealth of knowledge that the generations growing up without home economics classes will never be exposed to!  There are ingredients and measurements that no longer exist, and a seemingly inexhaustible variety of ways to stretch the most common and least expensive ingredients into delicious dishes.  Buy them up at yard sales whenever you see them!
Can you read the price of this hard covered cookbook, in the upper right hand corner?  $3.95!  So, I began looking through this book for "beetnick cake", and found nothing.  But, I did find a cake called, "Beat 'N Bake Cocoa Cake"....Say it fast a couple of times...do you think a young boy might hear this and think the grown up said "beetnick cake"?  That's exactly my theory.

Beat 'N Bake Cocoa Cake

1 1/2 C all purpose flour
3/4 C sugar
1/4 C unsweetened cocoa
1 tsp soda (I assumed baking soda)
1/2 tsp salt
1 tsp vanilla
1 C cold waer
1/4 C cooking oil (when's the last time you read "cooking" oil in a recipe?!)
1 Tbs vinegar

Preheat oven to 350 degrees.  Grease bottom only of an 8-inch square pan.  

Now the rest of the directions read that these ingredients are to be mixed right in the baking pan with a fork, but I could not bring myself to scrape a fork around the bottom of my shiny new baking pan, so I mixed the ingredients in my kitchenaid.

Combine flour, sugar, cocoa, soda, and salt.  Blend in vanilla, water, oil, and vinegar.  Mix well.  Bake for 30 to 35 minutes, or until top springs back when touched lightly in center.  Cool completely before frosting.

I removed the cake from the pan and frosted it with a vanilla buttercream frosting - the recipe for which is also found in the Pillsbury cookbook:

Vanilla Buttercream Frosting

3 Tbs softened butter
2 C confectioners' sugar
1/2 tsp vanilla
dash of salt
4 Tbs milk or light cream (I used half & half)

Cream the butter, with a mixer and add confectioners' sugar, vanilla, salt and milk.  Mix until frosting is thick enough to spread, but smooth and creamy.

The finished and frosted cake reminds me of "snack cake".  Not sure where in my childhood I heard that term, but that is what comes to mind...

The cake is moist and chocolatey without being overly sweet...my children like it...my husband says it's good, but still isn't sure this is THE beetnick cake of his childhood.

I did google "beetnick cake" and found recipes.  Whether spelled "beetnick" or "beatnick", there were cake recipes with pureed, mashed, and grated beets.  I'm sure these recipes were not served out at Midway School.....I'm pretty sure...

Saturday, January 12, 2013

Chicken enchiladas...kinda...

I love enchiladas!  Cheese, beef, chicken, seafood....haven't met an enchilada I didn't like.  Enchiladas are also a very economical dish.  Corn tortillas are cheap, minimal meat required, and any kind of cheese you have in the fridge will do.  The enchilada sauce is the most expensive ingredient at almost $2.00 a can. Yet, I do not like making enchiladas....the process seems to mess up my entire kitchen.  I use a skillet to fry the tortillas, a skillet (or pot or dish depending upon the meat) to cook the meat, a pot to cook the sauce, a grater and bowl for the cheese, and then the baking dish.  So, even though I love this cheap dish, I hardly ever make enchiladas.  But, this morning I woke up craving them.
After perusing several enchilada casserole recipes on Pinterest, and not finding any that matched the idea in my head exactly, I made up my own recipe.  Full disclosure:  the following recipe is a guess at the ingredients I've tasted in several enchilada casseroles at various potlucks through the years - I just don't have a recipe written down anywhere for it, so I made it up as I went today.

Layered Chicken Enchiladas

(I never call anything a casserole in my house, or my husband and children start picking at it and asking for the ingredient list.)

I started with 2 large chicken breasts, which I purchase in bulk at Costco.  They are inexpensive and huge.  I sprinkled them with salt, pepper, onion powder, cumin, and baked them in a glass dish for 45 minutes at 350 degrees.  I love the flavor of cumin with chicken or pork, but a little goes a long way, so I only sprinkle this spice on one side of the chicken.  I use onion powder because my husband doesn't like onions and has brainwashed my kids into thinking they don't like onions either.  

 I put the lid on these breasts and let them rest a few minutes before shredding the meat.  

The other ingredients are:
1 large can of green chili enchilada sauce
3 C of shredded cheese (cheddar, jack, colby - any kind will do, but I had monterey jack in the fridge, so that's what I used today)
1 C sour cream
1 dozen corn tortillas (raw - uncooked, unfried, because you don't have to worry about them tearing when you roll them up)
Pam cooking spray

I sprayed my 9x13 glass baking dish, and set aside, leaving the oven heated at 350 degrees after chicken was brought out.

I then shredded the chicken with 2 forks, and mixed in the sour cream, 2 cups of the shredded cheese, and 1/2 cup of the green enchilada sauce.
Then I poured a little of the enchilada sauce on the bottom of the baking dish and began layering.  I dip each corn tortilla into the can of sauce (I'm lazy - I suppose you could pour the sauce out into a shallow bowl and dip the tortillas in) and lay them down, overlapping a little at the bottom.  It's o.k. if they tear, in fact you may need to tear a few to fill in the corners and odd spots.

Then I spread half of the chicken mixture evenly over the tortillas.
And, then repeat.  After you've got the third layer of tortillas down, pour the remaining sauce evenly, over the top.  Lastly, sprinkle the remaining cup of cheese over the top and put dish into the preheated oven to bake about 30 minutes.
My family loved it, and ate it up with some sticky white rice and pinto beans.  
It cuts cleanly, and is not runny, but not totally firm either.  I was happy how this turned out, and am glad I didn't use any soup, as some of the recipes I looked at this morning called for.  For those of you that like a little spicier dish, I would suggest using pepper jack cheese.  I imagine that would be yummy.  So, please give this dish a try.  Just don't call it a casserole.

Tuesday, January 8, 2013

We've got eggs...

My husband and I went to Costco for our monthly "big" shopping trip last week.  Our monthly list rarely changes...toilet paper, dog food, meat, bread, sports drinks, coffee, sugar, and eggs are always on the list.  We actually enjoy going to Costco together.  We stop at the tasting stations, look at the new furniture or gadgets displayed in the middle of the store, argue over whether we need yet another, larger t.v.....

I usually have the list and lead the way, with my husband following along with the cart, picking up the items as we go.  We have a routine, which is pretty smooth, until we get to the check stand.  I like to get all of the items up on the belt/counter, in the order I want them packed back into the cart.  My husband takes only the top layer off, and leaves everything else in the cart, saying they can scan it while it's in there.  He will even put the bread up on the belt first!  (you know that's gonna get smashed in the packing of the cart.)  So, sometimes, for my own sanity and the preservation of our marriage, I have to look away while he is unloading the cart.

So, I guess I'm partly to blame for the fact that we came home with 120 eggs!  Yes, 10 dozen eggs!  My husband inadvertently picked up two of the large flats of eggs, and because he didn't take them out of the cart, but instead left them in there to be scanned, he didn't notice.  I did not notice either, because I was trying to ignore the fact he was leaving so much in the cart to be scanned.

What do you do with 120 eggs??  My husband suggested I start baking.  I looked up custard recipes and started checking my cupboards.  I also boiled some eggs to make egg salad with for the kids' lunches.  Then I ran across an idea on Pinterest....baked eggs.  I tried it and think you all should too:)

Baked eggs

The idea is to bake the eggs in a muffin tin, thereby ending up with perfectly round eggs that can be used for breakfast sandwiches.  

I sprayed Pam in my muffin tin, and cracked an egg into each well.


The directions said to bake the eggs in the oven at 350 degrees for 25 - 30 minutes.  I set my timer for 25 minutes, and could smell the eggs baking just before the timer went off, but did not take them out of the oven at that time, because when I looked at them, they still looked raw in the center yolk part.  So, I set the timer for 5 more minutes.  After 30 minutes the yolks still looked too yellow, but the edges looked a little dry and lacey.


I let them cool before trying one.  They were over done!  The bright yellow yolk, and shiny surface fooled me.  The top, thin layer had gotten hard, or plastic feeling, so I cut that thin layer off.  The egg tasted good.  We've eaten them with ham, on a thin bagel, and in a ham and egg sandwich.

We put them in a ziplock bag and kept them in the refrigerator because we planned on eating them all within a few days.  The pinner says they can also be frozen.

I will definitely do this again, although I plan on double checking the cart next time.

Sunday, January 6, 2013

Can Snickerdoodles really be called a dessert?

I say No.  My definition of dessert requires chocolate most of the time, and in the rare delicious dessert not containing chocolate, there is most definitely a gooey factor of some kind....peanut butter, caramel, cheesecake, or pudding filling.  Snickerdoodles do not have any of these qualities.  I know some of you may disagree.  My husband loves snickerdoodles, and will gobble them up with a large glass of milk.  I have a good friend who will even serve them as dessert at Bunco.
As paradoxical as this may seem, I am not a fan of brownies as a dessert.  They are chocolatey and a good one is gooey, but they are not my favorite.  I don't choose them on a menu, even when smothered with ice cream and toppings, and I do not bake them.  In fact, I think the only good brownie I've ever had was one made from scratch, by a good friend...you can taste the butter in her brownies!
But, my family likes snickerdoodles and brownies, it's raining today, and I have a new 9x13 heavy aluminized steel cake pan to try out, so I decided to try a Snickerdoodle Blondie recipe I found on Pinterest.
(Shiny new pan ready for use)

Snickerdoodle Blondies

2 2/3 C. all purpose flour
2 tsp. baking powder
1 tsp. cinnamon
1/4 tsp. ground nutmeg
1 tsp. salt
2 C. brown sugar
1 C. softened butter (2 sticks)
2 eggs (room temp)
1 Tbsp. vanilla
2 Tbsp. white sugar (for topping)
2 tsp. cinnamon (for topping)

Preheat oven to 350 degrees.  Lightly grease 9x13 pan.  
Combine flour, baking powder, cinnamon, nutmeg, and salt.  Set aside.
In a large bowl, mix butter and brown sugar together for 3-5 minutes.  Add in eggs, 1 at a time, then add vanilla and mix until smooth.
Stir in the flour mixture until well blended.  
Spread evenly into prepared pan and sprinkle the sugar and cinnamon mixture over the top of the batter. (I keep a mixture of cinnamon and sugar in a shaker, in my cupboard to top toast, hot cocoa, pancakes, ice-cream, etc.)
Bake 25-30 minutes, or until surface springs back when gently pressed.  Cool before cutting.
The recipe says it yields 20-24 bars....not sure in what world that happens?  In our house, it yielded 12 bars.
The family liked them a lot.  

I gotta be honest...this did not satisfy my craving for dessert...but it may be good for breakfast in the morning with coffee;-)

Friday, January 4, 2013

Christmas vacation must end....

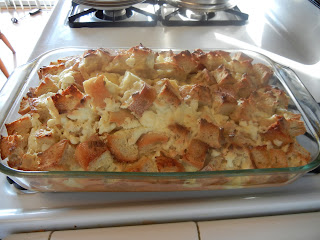
French Toast Souffle

My husband, Keith, left town yesterday afternoon, heading to Temecula for a long weekend of sales meetings for the new company he is employed with.  Sounds like work, but doesn't look like work...Knowing I'd be here, alone with our kids for the last few days of our Christmas break, still dealing with bouncing checks after my purse was stolen before Christmas, and embedded in a spring cleaning frenzy I did not intend to begin, I knew I would be in need of some cooking therapy.  So, I started looking through my Pinterest boards...I tend to pin a lot but often forget what I've pinned and then forget to actually try the idea I thought was so ingenious or yummy at that early morning pinning hour. 

I found this recipe for French toast souffle - essentially a baked french toast.  I've seen these and various strata recipes from time to time, but have never tried them.  I looked in my cupboards, and had everything the recipe required except for the "loaf of crusty bread".  So, I headed out to Costco and picked up the package of 6 small loaves of fresh baked sourdough in their bakery section.  (It was hard not to bust that package open with some real butter right when I got home!)

Ingredients assembled last night, while the kids were watching a mind-numbing episode of "A.N.T.S.", I began my therapy session...


The recipe called for 10 cups of a crusty loaf bread, cut up into 1 inch cubes.  I used small sourdough loaves, produced in Costco's bakery.  I used a 2 Cup measuring cup, and slightly overfilled it each time with the bread.  I ended up using 4 loaves of the bread.  As you'll see, I did end up with dry points on the top of the finished souffle.  I would recommend using less bread, if you want all of the bread to be immersed in the custard mixture.

I put the bread in a 9x13 dish, I had sprayed with Pam.


I used my Kitchenaid stand mixer to mix the rest of the ingredients for the custard which gets poured over the bread:

1 (8 oz) bar of cream cheese (recipe called for light, but that's silly in my opinion)
8 eggs (added one at a time)
1 1/2 Cups milk
2/3 Cup half & half
1/2 Cup of maple syrup
1/2 tsp vanilla

I mixed the cream cheese first until smooth and then added each egg, mixing after each.  The eggs and cream cheese did not blend in well together, the cream cheese broke into small clumpy pieces.  I've worked with cream cheese quite a bit, and I'm not used to this experience.  I think this happened because there was no sugar added to the cream cheese in the beginning (as you would with a cheesecake).  Next time, I may add the syrup before the eggs to see if this will keep the cream cheese smoothly blending with the eggs, and if not, I may add some sugar.  When the cream cheese clumps like this, you get bites with distinct sour cream cheese flavor, which my son for one, does not care for.


After blending the rest of the ingredients, I poured it evenly over the bread and put the dish in the refrigerator overnight to chill.


I set the casserole dish out on the kitchen counter a half hour before baking this morning, while the oven warmed up to 350 degrees.  (Recent reports of Pyrex exploding in ovens has me more cautious than usual.)

I let this bake for 30 minutes, but the middle was still runny (or soupy) when I checked it.  So, I let it cook for 10 more minutes, and knew it was done at that point because the center had puffed up as you would expect a souffle to do, and my knife came out clean, when inserted in the middle.  (This test also deflates the puffy middle)


The recipe suggests pouring syrup over the top and sprinkling with powdered sugar, after removing from the oven, but I prefer to top individual pieces after cut.


My kids and I enjoyed this breakfast, but each of us have definite ideas of how to improve upon the recipe next time:  My daughter, Kaley thinks the custard should cover all of the bread, because she doesn't like the crusty dry parts on the top.  My son, Kellen, does not like the bits of definite cream cheese taste in some of the bites.  I like the crusty top portions dipped in the syrup, and am happy with how it turned out over all.  But, in my next attempt, I think I may try to make the custard a little more like creme brulee (add some eggs, more cream, and sugar), for a sweeter dish.

Our last day of Christmas vacation started out nicely with this warm breakfast, but I'm sure this serenity won't last long....

Tuesday, January 1, 2013

New Year's Luck

Black Eyed Peas

Black eyed peas, eaten on New Year's Day, are supposed to bring good luck and prosperity in the coming year.  I've known this tradition existed, but am not a huge fan of black eyed peas, so I've never cooked them up, and most years I'm so focused on getting the football food ready for the day, that I forget about this tradition until late in the day - too late to whip some up.  But, I am a sucker for tradition tied to a good story, so this year I planned ahead to start off the New Year with a pot of black eyed peas.

According to Wikipedia (the deepest source I could muster up the energy to locate on an early New Year's morning) black eyed peas were grown in the southern region of the United States as early as the 18th century.  They are still a mainstay in southern cuisine today.  George Washington Carver (an American scientist born into slavery and most known for his work with peanuts) encouraged the planting of black eyed peas because they add nitrogen to the soil.  Black eyed peas are rich in calcium, folate, and Vitamin A.

The tradition of eating black eyed peas on New Year's Day, in order to bring prosperity throughout the New Year, dates back thousands of year, in world history, to the Babylonian Jews.  Jews arrived in Georgia in the 1730s and brought this tradition with them, and it seems to have been adopted into American culture around the Civil War period.  Some sources state these "field peas" were the only thing left untouched by Sherman's March to the Sea because they were thought to be only suitable for animal fodder.  This reference to the Civil War is enough to hook this history teacher into trying out the dish.

So, I bought a 16 oz bag of "blackeye peas" at the store yesterday, for $1.59, and followed the directions on the back of the package.  I soaked them in a big pot of cold water, overnight (8 cups to be exact).  Then this morning, I poured the beans and water into a colander and rinsed them with cold water.  I noticed some of the skins coming off, so I picked those out of the beans.  I'm not really sure if you're supposed to remove the skins or not?  You lose the "black eye" of the bean when you lose the skin...
So, I stopped shucking all of the skins, fearful I'd end up with a pot of white beans.  I poured the beans into my trusty crock pot, and covered them with 8 cups of fresh tap water. 

Then I cut up some of the left over ham from last night and added that into the pot.  I chose the fattier, uglier pieces on purpose, thinking the fat would add more flavor and that my family would not want these pieces on a sandwich later.

I'm not sure if I added enough ham to flavor the beans or not....I also added some salt and pepper, but intentionally kept the salt light, thinking the ham will add some salt to the pot as well. 

I'll post the picture of the finished product and let you all know how it tasted.  Until then, I have football food to prepare and a Christmas tree to take down.
Not enough ham...next time I'll take Ashley's advice and add a whole ham hock to the pot.  Not enough salt either, so they came out rather bland.  But, adding a little tabasco, as suggested by several recipes doctored them up good and tasty.  Happy New Year my friends.