Friday, December 27, 2013

Clementine Cake?

We took the kids to see "The Secret Life of Walter Mitty" last night.  What a great movie!  We all liked it a lot.  Funny, upbeat, real, good story with a great ending - I highly recommend it.  Central to part of the plot was this thing called a Clementine Cake...?  I'd never heard of it.  Looked like a single layer of a round cake with sliced oranges on top...maybe like an upside down cake?  I honestly thought it was made up for the quirky characters in the movie, and let it go at that. 

Then my husband text me from work this afternoon, "Are you gonna make a clementine cake?  You can use the cuties."  We have cuties on our kitchen table, delivered by a neighbor.  My kids like them, but can never eat all that she brings over before they start turning bad.  So, my husband was thinking of that cake?  And, he wanted me to make it?  Although I bake all of the time, it is very rare that my husband actually requests something. (I like to think this is because he is happy with everything I bake)  I was on it.  Pinterest is my friend, and within a matter of seconds, I was staring at a variety of clementine cake recipes.  I went with the one that looked most like the one we saw in the movie, and whipped it up pretty quickly.

Clementine Cake

Cake Ingredients:
1 cup (2 sticks) unsalted butter, room temperature
1 cup granulated sugar
4 eggs, room temperature
1 1/2 teaspoon grated clementine zest
2 cups all purpose flour
1 tablespoon baking powder
1 teaspoon salt
7 tablespoons fresh squeezed clementine juice (I needed about 7 clementines total to make the cake and glaze)

Glaze Ingredients:
1 1/2 – 2 cups powdered sugar
4 tablespoons fresh squeezed orange juice
grated clementine zest
Directions:
Heat the oven to 350 degrees F. Butter a 9-inch cake pan and line the bottom with parchment paper. Butter the paper and set aside> (I never use the parchment paper - not sure if it really makes a difference - my cakes don't stick because I wait for them to cool completely to invert the pan.  And, I always put the pan side of the cake down on the plate.)

Cream the butter and sugar well for several minutes, until it is very pale and thick.

Add the eggs one by one, beating well after each addition, then add the zest. (I did not add the zest, because I don't like zest in anything - it's a texture thing, not a taste thing.)  Add the flour, baking powder and salt all at once, and beat well, then slowly add the clementine juice until it is incorporated.

Pour the batter into the prepared cake tin, and bake for 35-40 minutes – or until an inserted skewer comes out clean (If it starts to brown too much on the top, cover loosely with a sheet of foil.)

 Allow cake to cool in pan for 15-20 minutes on a wire rack. Then invert onto a plate, remove the parchment paper and allow to cool completely before glazing.

To make the icing, stir the clementine juice into the icing sugar until you have the right spreading consistency. Using a skewer, dowel, or toothpick, poke holes through entire cake to allow glaze to seep down into it. Pour the icing onto the cake and spread with a spatula or butter knife, allowing the icing to drip down the sides of the cake.

I served it with fresh whipped cream (you can see the silver canister I use in the background). 

I personally didn't really like the cake...not sweet enough or orangy enough for me.  (Maybe because I did not add the zest called for in the recipe.)  However, all of my family loved it, saying it was sweet enough.  My son compares it to a pound cake.

It may taste good with some coffee in the morning...I'll give it one more try;)

Saturday, December 21, 2013

I'm back!

Christmas baking!

My daughter asked me this week, "Why do we make so many desserts and eat so much candy during Christmas?"  I had no answer for her, but it got me thinking....maybe we should just keep on baking through the New Year?  In preparation for a few Christmas celebrations coming up this week, I spent my Saturday (and first day of Christmas vacation:) grocery shopping, cleaning, baking and wrapping.  I'm going to share a recipe for Coconut kiss cookies tonight.  My husband says they're really good...I don't know...I do not care for coconut.  He says they taste like a macaroon.  I also made 2 batches of chocolate fudge, 1 pecan pie, 1 loaf of zucchini bread, and prepared the scalloped potatoes for tomorrow.

Here is the recipe, as copied from Pinterest:
(I made some changes which I'll explain below)

Coconut kiss cookies

2 1/2 cups All purpose flour
1 Tablespoon plus 1 teaspoon baking powder
1/2 teaspoon table salt
2/3 cups butter, softened
6 oz. cream cheese, softened
1 1/2 cups granulated sugar
2 egg yolks
1 Tablespoon plus 1 teaspoon Vanilla extract
1 Tablespoon plus 1 teaspoon juice from a fresh orange
10 cups sweetened flaked coconut, divided in to 6 cup and 4 cup portions
1 bag Hershey Kisses (48 pieces)
Step 1: In a medium bowl, sift flour, baking powder and salt. Set aside.
Step 2: In the bowl of an electric mixer, beat the butter, cream cheese, and sugar until light and fluffy. Add egg yolks, vanilla and orange juice and beat till smooth.
Step 3: In 1 cup increments, mix flour in to the butter mixture. Add the 6 cups flaked coconut and beat to combine.
Step 4: Refrigerate dough for 1 hour. While dough is chilling, remove wrappers from the Kisses.
Step 5: Preheat oven to 350. One at a time, scoop dough into 1.5" balls (about the size of a large walnut, roll between your palms, then roll in the bowl of remaining coconut (4 cups). Arrange on an ungreased baking sheet, at least an inch apart (cookies will spread slightly). A standard cookie sheet should accommodate a dozen cookies at a time. Bake 12-14 minutes, until the cookies puff and are very lightly browned.
Step 6: Remove from oven. Immediately press one Kiss into each cookie. Return pan to oven and bake for an additional minute.
 
Step 7: Remove pan from oven and cool on a rack for 10 minutes. With a thin spatula, gently move cookies on to a rack to finish cooling.
 
My changes:  I did not use orange juice and I used half the coconut that the recipe calls for (again, I don't like coconut). 


And there you have coconut kiss cookies!
 
I started this blog last year, as part of a New Year's resolution.  I started out pretty good, and was encouraged that people actually looked at the page, but then somewhere between the middle of summer fun and the craziness that always comes with the new school year, I dropped the ball.  So, here I am, sitting on the couch waiting for the elevel o'clock news, and thinking about resolutions.  One of them is going to be to get back on track with this project.  Baking and cooking are things I enjoy doing for my family.  And, I'm looking forward to sharing my successes here.
 
Wishing you all a Merry Christmas!

Thursday, July 18, 2013

Costco + Impulse Shopper = Creative Kitchen Creations!

If necessity is the mother of all invention than impulse shopping is the mother of all creativity in my kitchen!  We've been here before...my husband came with me to Costco, which means I know we will walk out of there with more than what is on my list.  But, lately, this is the only time and place we have an hour and half without the kids (they hate going to Costco unless it's lunch time and they can count on a slice of pizza and a berry smoothie) so I ask him to come along, and pretend it's a date.  It was on one of these trips that he convinced me we should buy the huge pack of Activia cups.  I'm not a yogurt eater in general and neither are our kids.  None of us dislike yogurt, it's just not the thing we reach for when that refrigerator is open.  But, if I remember correctly, this was probably shortly after Christmas and he convinced me that yogurt in the morning would help me stay full until lunch at a minimal number of calories, plus osteoporosis concerns, yada, yada, yada.  So, we bought the huge pack of yogurts (vanilla, strawberry and vanilla flavored).  And as the expiration date approached, we still had 18 cups of uneaten yogurt in the fridge.  Not wanting to throw them all out and admit to wasting money, I froze them.  Just put them all into the freezer just as they were - no extra precautions or wrappings.  Now, I don't know if the weird (kinda gross) bacteria cultures that make yogurt good for your digestive system actually survive freezing, but I didn't really care at that point.  I was in money saving mode.

Fast forward to this afternoon.  It is 98 degrees outside (almost considered a cooling trend here), and my daughter and I have spent most of our morning painting nails.  Her latest obsession of YouTube tutorials and my Pinterest illness have combined to create a little nail salon in our kitchen, much to the chagrin of my husband.  We needed something refreshing and Kaley suggested a smoothie.  My husband is our smoothie maker, but he was working, so I started looking through the freezer for fruit, and fridge for juices.  That's when I spotted the frozen Activia cups!  I took 2 of the vanilla cups out and planned to mix those with some of the frozen strawberries I found, and whatever fruit juice I found.  But, I didn't find fruit juice.  The only liquid other than tea was lemonade.  So, I pitched it to my daughter...how about a strawberry lemonade smoothie?  She was in.

Strawberry Lemonade Smoothie

2 single serving containers of frozen Activia
6-8 large frozen strawberries (also purchased at Costco of course)
1 cup (or more) of lemonade
Blend until you've reached your desired consistency.  This may mean you have to add more lemonade.

Getting the frozen yogurt out of the containers wasn't easy.  I ended up cutting the lip of the container and peeling it off. 

What we ended up with was very good!  A little tart, but sweet also.  I don't know if we're getting any health benefits from the yogurt at this point, but I'm sure that the smooth, creamy consistency and flavor was a direct result of using the frozen yogurt.

The success here is found in the fact that the impulse item purchased on the date with my husband at Costco did not go to waste!  Wish they sold nail polish remover in bulk:-/


Sunday, July 7, 2013

Too hot to bake? Never!

My husband says it's too hot to turn on the oven, too hot to cook, too hot to bake anything...but it's my therapy!  So, I've resorted to sneaking.  I bake late at night, after he's gone to bed, early in the morning before anyone else is awake, and today, when he was preoccupied with cleaning the garage, I baked.  Yes, he came in and complained of the heat in the family room (which is connected to our kitchen), but the moist, cool sweetness of the Aloha cake this evening after towing my car to the dealership was totally worth it.  (The car is a story for another time.)

Honestly, I try to find desserts that do not require the oven.  I spend hours scrolling through Pinterest and other sites, looking for cool, refreshing desserts, but there are only so many variations you can put on the cool whip pie (kool aid, jello, yogurt, pudding, etc.)  So, while my husband was out cleaning the garage this afternoon in preparation of installing a new garage door opener (another impulse buy at Costco which will surely cause an argument before it is up and running) I turned on the oven to bake an "Aloha Cake", I found on Pinterest.  It calls for mandarin oranges and pineapple, both of which I have cans and cans of as a result of a sale at Winco last month.

Aloha Cake

1 boxed yellow cake mix
3 eggs
3/4 C veg. oil
1 11 oz. can of mandarin oranges with the juice
1/2 tsp vanilla extract


Mix all of the above ingredients about 2 minutes, or until everything is incorporated.  I used my stand mixer, and the oranges did break up a little, but I don't like to bite into whole orange segments in the cake, anyway.  Pour the cake batter into a greased 9x13 pan, and bake at 350 for 25 - 30 minutes.


Let the cake cool completely before frosting:


1 tub of cool whip (thawed)
1 pkg (3 oz) vanilla pudding
1 15 oz can of crushed pineapple with the juice

Mix all of these ingredients with mixer until everything is well incorporated.  Again, I used my stand mixer.  Spread the frosting across the cooled cake, and refrigerate until it is served.  You will also need to refrigerate any leftovers.


My family is picky about texture, and they were all "worried" when they saw the pineapple bits sticking through the frosting.  But, every single one of them proclaimed the cake to be yummy!  It is a very moist, sweet cake, that has a cool, refreshing taste on a hot summer's night.  This easy cake will definitely be making another appearance this summer.


As a variation, I've seen recipes substitute the vanilla pudding with coconut pudding in the frosting.  I don't like coconut flavor, so although my family does like coconut, they may never get a taste of this variation:-O


Sunday, June 2, 2013

May is over...Whew!

May is a crazy month in the Drewry household.  It's the last month of the school year for a teacher who is more anxious to start her summer "vacation" than the 2 teenagers in our house.  (I say vacation, although we have no plans for an actual vacation, and the summer is often more busy than the school year.)  I tend to let things go in May, knowing...or thinking....I can catch up in June, once school is out.  So, I've just spent the last day and a half cleaning up and putting away various piles of stuff from around the house.  We can actually see and sit on the sofa in the family room now!

May is also a crazy month in our household because we have a lot of celebrations in May...Mother's Day, my Dad's birthday, my Mother-in-law's birthday, my nephew's birthday, and our own children's birthdays are all in May.  Kellen and Kaley were born exactly a week apart in May (and 2 years), which I thought was brilliant at the time...being a teacher, I got to stay home all summer with each baby after they were born.  Now, these two birthdays at the end of the month, add to the chaos!

With the kids getting too old for the traditional birthday party at the park/pizza place/or latest "it" place, we have settled in to a very nice tradition of having a home-cooked family meal of the birthday person's choice, including dessert.  Kaley chose eggplant Parmesan, my special rice, and mini cheesecakes with a hazelnut chocolate ganache.  Kellen chose bbq steaks, cheesy garlic bread, and a cookies and creme cake.  I'm quite good at cheesecakes, have baked a lot of them (and even dropped a huge NY cheesecake fresh from the oven while winning a radio contest...but that's a different blog), so that was easy.  The cookies and cream cake was more of a challenge.  When I say challenge, I mean I had to find a recipe...Pinterest is my friend.  So, what follows is the recipe and results for the cookies and cream cake.  The family loved it, and it may just be the best frosting I've every made...

Cookies & Cream Cake

1 box of white cake mix (with the called for eggs, oil & water)
1 pkg of Oreo cookies

I used my Kitchenaid mixer to mix up the white cake as instructed on the back of the box.  I always use the whole egg option - which means the cake will yellow a little bit, but I like the taste better.  After the cake was mixed, I stirred in 15 crushed oreos into the batter.  I crushed the oreos in a large freezer ziplock bag, with the back of a heavy ice cream scoop.

I poured the batter into 2 prepared round cake pans.  The batter is think and lumpy.

I baked according to the directions, and then cooled the cakes completely before I frosted them.


Cookies & Cream Frosting

1 (8 oz) pkg of cream cheese (softened)
1 (16 oz) box of powdered sugar
1 (8 oz) container of cool whip (thawed)
1/4 tsp. vanilla
15 oreos (crushed)

I used my Kitchenaid stand mixer to mix the cream cheese and sugar until smooth and creamy.  Then I added the whole container of cool whip and continued mixing, adding in the vanilla before complete.  I gotta tell you, at this point the frosting was yummy!  My daughter and I were trying to share the beater, by taking polite finger slide fulls of frosting to taste, but each of us really just wanted to lick that thing clean.  I was hesitant to add the cookies because the frosting was so smooth and creamy.  But, I folded the crushed Oreos in and was not at all disappointed.

It is not the prettiest cake I've ever frosted...

But, it is soooo delicious!  The frosting truly tastes like the middle of the Oreo cookie...there is no sour cream cheese taste that you sometimes get when it is the base of the frosting.  This is what makes this frosting a hit with my kids.  Although they both like cream cheese and cheesecakes, they do not like the taste of a cream cheese frosting as much as they do a butter cream.  I guess it's the cool whip that cuts down on the sourness.

I think this cake will be requested again...

Sunday, April 7, 2013

Buttermilk!

Buttermilk is not used enough!  I'm on a mission to bring it back...kinda...maybe.  I bought a quart of buttermilk before Easter, because a cake recipe called for it. But of course, I only needed a cup of it, and had a lot left over.  This has happened to me several times in the past and I usually find it well past the expiration date in the back of the fridge.  This time, as I bought the carton, I told myself I was going to bake this cake 4 times if necessary, in order to use up the buttermilk before it goes bad.  But, in addition to the chocolate cake I baked, I also made a strawberry pie, chocolate mint cookies, and lemon bars, and being well stocked with such desserts could not bring myself to bake more cakes in order to use the buttermilk, and so it sat on the top shelf of the fridge, way in the back for another week....

This past Saturday, I woke up early, excited about a weekend with some extra time, and the promise of great weather.  I brewed a pot of coffee, read through emails, paid out bills, started a load of laundry and settled in front of the computer to browse pinterest...the rest of the house was still asleep as it wasn't even 7 a.m. yet. (The Army has nothing on moms with a list of chores!)  In a good mood, and fueled with Dunkin' Donuts' dark roast, I started looking for breakfast casseroles to make with the left over ham I had in the fridge (also from Easter).  I found a good looking recipe, which called for milk or cream.  Normally, I'd reach for the half and half I always have on hand (coffee drinker;) but this time, I spied the tall, slender, yellow carton at the back of the fridge and grabbed it instead.  I used the buttermilk in the recipe I'm sharing here, and am convinced this ingredient made the dish richer and thicker.

Ham and egg casserole

Ingredients:
1 C cooked ham, cut into small pieces
2 C shredded cheese (whatever kind you like - I used Colby jack because that's what I had on hand)
1/4 C grated Parmesan cheese
1 Tbsp flour
1/4 tsp Greek seasoning (used Italian seasoning because I didn't have Greek seasoning)I
1/4 tsp pepper (divided in 2)
1/4 C butter - melted
12 eggs
1 C milk, half & half, or cream (I used buttermilk)
1/2 Tbsp Dijon mustard

Instructions:
  1. Preheat oven to 350 degrees and lightly spray a 13x9 baking dish with cooking spray
  2. Cut ham and add to large bowl
  3. Add shredded cheese, Parmesan cheese, flour, Italian seasoning and 1/8 teaspoon pepper, combine and pour into baking dish evenly
 
     4.  Melt butter and pour over ham mixture
     5.  In a large bowl, add 1 cup buttermilk or cream, break eggs into measuring cup, add Dijon mustard and 1/8 teaspoon pepper, whisk well
     6.  Pour over ham mixture
 
     7.  Bake uncovered at 350 degrees for 30-35 minutes or until a knife inserted in the middle comes out clean.
 
     8.  Optional: sprinkle casserole with more cheese and return to oven for a couple minutes until cheese is melted and bubbly.
 
My family ate it up!  The Dijon mustard gives it a slight tanginess that goes well with the ham, and the buttermilk makes it rich and velvety.  I don't know how many calories I added with the buttermilk, and I don't plan on checking on that...but I do plan on using buttermilk in the mashed potatoes I'll be making to go along with the bar-b-q pork I'm cooking for dinner tomorrow night!

Tuesday, February 26, 2013

Cupcakes!


My husband took our daughter to softball practice tonight, and my son tagged along to shoot some hoops, so that leaves me with some free time all to myself!  Enjoying a freshly brewed cup of Dunkin Donuts coffee, with the Food Network running a marathon of "Chopped!", I plan on catching up on this blog.

The subject for today's blog is cupcakes!  I know most people love them...I'm not usually a fan.  I'll eat a cupcake whenever offered, and really like all of the cute cupcake ideas I see on Pinterest, and my kids love them, but I have never liked making them.  I end up making a mess, there never seems to be enough batter for the whole 2 dozen, I'm not a very good decorator and honestly the worst thing about cupcakes is that I have no easy or good way to store them. 

However, as a mother of two and a teacher, with a slight guilt complex for working outside the home, I've purchased the double decker tupperware cupcake holder and baked a few dozen throughout the years.

So, when I was selected as one of the teachers who would "kiss the pig", during FFA week, I decided the best way to raise money for the math teacher's jar was a bake sale.  (Of course, selling of cupcakes on a high school campus, without nutrition labeling, to students would be illegal, so I merely offered the cupcakes to students and staff in return for a donation to the "Mr Rios will kiss the pig fund".)  I made a different cupcake every day, and raised $313.84! 

Below are the recipes and some pictures of the cupcakes.  I apologize for the quality of the pictures...they were taken with my phone, in order to upload to post on Facebook, teasing the staff with the next flavor....not really thinking about blogging at that time.

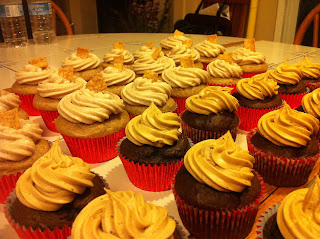
Cinnamon Toast Crunch Cupcake

First up were these yummy treats that my children love.  I found the recipe on Pinterest and thought this was the best frosting I had ever tasted the first time I made it.

Cinnamon Cake:
3 eggs
1/3 cup oil
¾ cup buttermilk
1 teaspoon vanilla extract
¾ cup sour cream
Vanilla Cake Mix (not white cake mix)
1 ½ teaspoon cinnamon
Cinnamon Toast Crunch Buttercream:
8 oz cream cheese, softened
½ cup butter, softened
1 teaspoon vanilla
3 cups powdered sugar
2/3 cup Cinnamon Toast Crunch powder
(Crush the cereal in a bag and then sift out 2/3 cup)

1. Preheat oven to 350 degrees and line pans with 20-22 cupcake liners.
2. In a large bowl, gently combine eggs, oil, buttermilk and vanilla.
3. Mix in sour cream.
4. Add cake mix and cinnamon and mix until smooth.
5. Stir in lightly crushed cereal.
6. Fill cupcake liners ¾ full and bake for 15-18 minutes, or until an inserted toothpick comes out clean.
7. Buttercream: Beat cream cheese and butter until fluffy. Add Cinnamon Toast Crunch powder. Add vanilla and powdered sugar. Adjust the consistency using milk if it is too thick.
8. Pipe onto cooled cupcakes and top with cinnamon sugar and Cinnamon Toast Crunch squares.
 

Chocolate Mocha Cupcake

1 box of Devils Food cake mix, prepared as directions on the box suggest.
 
Shhhhhh!  Almost every cupcake I make is "semi-homemade".
 

Mocha Frosting

1/3 C butter (softened)
4 C powdered sugar
1 tsp vanilla
1 dash of salt
4-6 Tbsp of half and half (my secret to yummy frostings is to substitute half and half for milk)
3-4 Tbsp of unsweetened powdered cocoa
1 tsp of instant coffee granules
 
Cream the butter, add sugar, vanilla, salt, cocoa, and coffee.  Add the half and half a little at a time, until you achieve the consistency you desire.
 

Decorating

Let's talk about that frosting for a minute....looks good, huh?  I only have one tool...my Pampered Chef tool you see in the picture below...
I use this to frost all of the cupcakes.  I usually have to load it twice for 2 dozen cupcakes.  But, I found another use for it in my week long baking frenzy....fillings!  I made a chocolate cupcake with a creamy vanilla middle and topped with a chocolate glaze...kinda like the long lost Hostess cupcake.
 

Mock Hostess Cupcake

1 box of Devil's Food chocolate cake mix, prepared as suggested by the directions on the back of the box.
 
Creamy Center
1 cup of salted butter
3 teaspoons of vanilla
4 cups of icing sugar (powdered sugar)
4-5 tablespoons of coffee cream (18% and up)
 
After the cupcakes have cooled, load the Pampered Chef tool with the butter cream frosting.  Then insert the tip of the frosting gun into the cupcake and push a glob in.  The top of the cupcake will have a small hole, with the white frosting visible inside, but it will be covered by the chocolate gaze.  This technique is much easier than the poke cake method (poking a hole with a wooden spoon handle and then filling each hole).
 

Chocolate glaze

2 C powdered sugar
4 squares of semi-sweet Bakers chocolate (melted in the microwave)
1/2 tsp vanilla
1-2 Tbsp half and half
 
Blend all ingredients to desired thickness.  I actually melted the chocolate in a small pot on the stove top and then added the other ingredients until everything was blended.  I then used a large spoon to ladle and smooth the glaze over the cupcakes.
 
The result was delicious!  Beware of adding the filling before the cupcakes have cooled, however, the cream will just melt into the chocolate cake.

One last tip on cupcakes....you've probably all seen this on the food network, and may already use this tool, but I never had.  Part of my frustration with baking cupcakes is trying to get the batter into the cupcake, evenly, without making a mess all over the cupcake pan and edges of the cupcake papers. 
That's right...the ice cream scoop!  I have a rather large one hear, with the squeeze scraper.  Seriously, this scoop kept me sane in a crazy week of cupcake baking.  I had to go buy one.  I didn't own one before Christmas break.  Now, I would never think of any other way to fill a cupcake paper.

O.K., I'm all cupcaked out!  I made other flavors:  strawberry with white chocolate chips and a creamy vanilla frosting, a banana pudding cupcake with banana pudding in the center, a spice cake with a brown sugar butter cream frosting, and a maple bacon cupcake!  Those recipes will just have to wait for another day.

Oh, yeah, I did have to kiss that pig!  Mr. Rios sold cup of noodles with slices of lime and raised over $590 for my jar!
Teenagers are crazy!  And, don't let this little piggy fool you....he screamed like a demon possessed!
Cinnamon Cake:
3 eggs
1/3 cup oil
¾ cup buttermilk
1 teaspoon vanilla extract
¾ cup sour cream
Vanilla Cake Mix (not white cake mix)
1 ½ teaspoon cinnamon
(There used to be cereal pieces in the batter, but that has been removed due to comments saying it's better without it)
Cinnamon Toast Crunch Buttercream:
8 oz cream cheese, softened
½ cup butter, softened
1 teaspoon vanilla
3 cups powdered sugar
2/3 cup Cinnamon Toast Crunch powder
(Crush the cereal in a bag and then sift out 2/3 cup)
- See more at: http://www.yourcupofcake.com/2011/10/cinnamon-toast-crunch-cupcakes.html#sthash.onjfhU3y.dpuf


Sunday, January 27, 2013

Beetnik Cake!


Here is the real thing...beetnik cake!  My husband and kids love it.  And, I think I've found a way to get more fiber and folic acid in my diet:)

A brief history...

In case you have not read my last post, this quest to find a recipe for beetnik cake starts with my husband.  He has very fond memories of a chocolate cake with white frosting, made in the cafeteria of Midway School, in Fellows, California, that he calls beetnik cake.  We've never ran into anyone else that has any idea of what he is talking about.  So, a couple of weeks ago, I found a "beat n bake cake" recipe, that I surmised was the cake he had mistakenly heard referred to as "beetnik cake".  Before baking this Pillsbury recipe, I googled beetnik cake and found several recipes with beets in it, and dismissed this as a weird coincidence.  Surely no cafeteria in America would bake beets into a chocolate cake!
I was corrected by my best friend's grandmother.  Tootsie is a wonderful woman who spent a lot of years cooking in the cafeteria of North High School.  She informed me that she used to bake beetnik cake, and that indeed many schools used beets in their cakes...."How else do you think we would get those kids to eat their vegetables?"
So, I looked through the recipes again and baked up a true beetnik cake this afternoon.

Beetnik Cake

1 1/2 C well drained & mashed cooked beets
1 tsp vanilla
1 1/2 C white sugar
1 C vegetable oil
3 eggs
1 3/4 C all purpose flour
1 1/2 tsp baking soda
1/4 tsp salt
6 Tbsp unsweetened cocoa powder

Preheat oven to 350 degrees and grease and flour a 13x9 pan.  Most recipes direct the pan to be greased and floured, but I don't like the look or the taste of that thin layer of flour on the outside of the cakes, so I just spray the pan with cooking spray, and have never had a cake stick to the pan.  With bundt cakes or other such cakes that won't be frosted, I grease and sugar the pans, so the outside of the cakes are still pretty and tasty.

I bought 1 can of beets, thinking that this would be enough for 1 1/2 C of mashed beets.
As you can see, I bought the generic brand found at Winco.  Tootsie told me they used the canned beets they received from the government and the cakes always tasted moist and delicious.  My mother in law has told me on several occasions that the government issued canned foods were of very good quality.  Anyway, the point is, you don't have to spend a lot on name brand beets.  However, you will need more than 1 can.  This can only amounted to 1 cup of smashed beets.  I did not run out to the store to get another can when I realized I was short.  I just baked the cake with 1 cup of beets rather than the 1 1/2 cups the recipe calls for.  Not sure it made a real difference?
Now, mashing these beets was not the easiest task.  Knowing that I didn't want to have to clean up beet juice from a lot of appliances, bowls, utensils, etc, I thought the easiest way to mash these would be to chop them up first and then mash with my potato masher.  Wrong.
Although they are softened, they are not easily mashed.  So, I had to drag out my mini processor.  This did the trick, quickly.
Next, I mixed this cup of mashed beats with the eggs, vanilla, oil, and sugar.  It sure looked pretty...
Then I added the flour, cocoa powder, baking soda, and salt, which I had mixed together in a separate bowl.
Then I poured it into the prepared pan, and put it in the preheated oven, and baked it for 25 minutes.
It was still a little wet on the toothpick when I checked it after 25 minutes, so I set the timer for 3 more minutes.  It was done and smelling chocolately after 28 minutes.  I set it out to cool before I frosted it.
I frosted it with a simple vanilla buttercream because my husband remembers it with white frosting.  However, I think any frosting would taste good on this...chocolate, mocha, or peanut butter comes to mind.

Vanilla buttercream frosting

3 C powdered sugar
1 tsp vanilla
1/4 C softened butter
4-6 Tbsp of half & half (I always use half & half when the frosting recipe calls for milk)
Mix it till smooth, adding more cream if too stiff to spread.  Then frost the cooled cake.

The finished cake is moist, chocolaty, and delicious.  We did not taste the beets at all, nor does the cake have a red tint.  This dessert was easy....and may find itself in my usual rotation.  The aroma of this cake baking in the kitchen this afternoon, kept my mind off the fact that we have a full week of school starting tomorrow morning, with more than 2 weeks until our next holiday...and that's good therapy.

Monday, January 21, 2013

Beetnick Cake?

My husband has very fond memories of something he calls "beetnick cake".  It was a single layered chocolate cake, with white frosting that was served in the cafeteria of Midway School, in Fellows, California.  He's asked me several times if I remember this cake (although I did not go to Midway School), he asks friends if they remember this cake (none of whom went to school with him either), and every time we're at a deli or restaurant serving a chocolate sheet cake with white frosting, he will ask if it is beetnick cake.  We have yet to run into a cake with that name.
Over the three day weekend, the sun was shining in through the sliding glass door of our kitchen, and I felt like cooking something up for my husband.  I pulled out an old Pillsbury cookbook. Published in 1969 - the year of my birth!  And, might I go off on a tangent for just a minute to exclaim how much I love and treasure old cook books!  They have a wealth of knowledge that the generations growing up without home economics classes will never be exposed to!  There are ingredients and measurements that no longer exist, and a seemingly inexhaustible variety of ways to stretch the most common and least expensive ingredients into delicious dishes.  Buy them up at yard sales whenever you see them!
Can you read the price of this hard covered cookbook, in the upper right hand corner?  $3.95!  So, I began looking through this book for "beetnick cake", and found nothing.  But, I did find a cake called, "Beat 'N Bake Cocoa Cake"....Say it fast a couple of times...do you think a young boy might hear this and think the grown up said "beetnick cake"?  That's exactly my theory.

Beat 'N Bake Cocoa Cake

1 1/2 C all purpose flour
3/4 C sugar
1/4 C unsweetened cocoa
1 tsp soda (I assumed baking soda)
1/2 tsp salt
1 tsp vanilla
1 C cold waer
1/4 C cooking oil (when's the last time you read "cooking" oil in a recipe?!)
1 Tbs vinegar

Preheat oven to 350 degrees.  Grease bottom only of an 8-inch square pan.  

Now the rest of the directions read that these ingredients are to be mixed right in the baking pan with a fork, but I could not bring myself to scrape a fork around the bottom of my shiny new baking pan, so I mixed the ingredients in my kitchenaid.

Combine flour, sugar, cocoa, soda, and salt.  Blend in vanilla, water, oil, and vinegar.  Mix well.  Bake for 30 to 35 minutes, or until top springs back when touched lightly in center.  Cool completely before frosting.

I removed the cake from the pan and frosted it with a vanilla buttercream frosting - the recipe for which is also found in the Pillsbury cookbook:

Vanilla Buttercream Frosting

3 Tbs softened butter
2 C confectioners' sugar
1/2 tsp vanilla
dash of salt
4 Tbs milk or light cream (I used half & half)

Cream the butter, with a mixer and add confectioners' sugar, vanilla, salt and milk.  Mix until frosting is thick enough to spread, but smooth and creamy.

The finished and frosted cake reminds me of "snack cake".  Not sure where in my childhood I heard that term, but that is what comes to mind...

The cake is moist and chocolatey without being overly sweet...my children like it...my husband says it's good, but still isn't sure this is THE beetnick cake of his childhood.

I did google "beetnick cake" and found recipes.  Whether spelled "beetnick" or "beatnick", there were cake recipes with pureed, mashed, and grated beets.  I'm sure these recipes were not served out at Midway School.....I'm pretty sure...

Saturday, January 12, 2013

Chicken enchiladas...kinda...

I love enchiladas!  Cheese, beef, chicken, seafood....haven't met an enchilada I didn't like.  Enchiladas are also a very economical dish.  Corn tortillas are cheap, minimal meat required, and any kind of cheese you have in the fridge will do.  The enchilada sauce is the most expensive ingredient at almost $2.00 a can. Yet, I do not like making enchiladas....the process seems to mess up my entire kitchen.  I use a skillet to fry the tortillas, a skillet (or pot or dish depending upon the meat) to cook the meat, a pot to cook the sauce, a grater and bowl for the cheese, and then the baking dish.  So, even though I love this cheap dish, I hardly ever make enchiladas.  But, this morning I woke up craving them.
After perusing several enchilada casserole recipes on Pinterest, and not finding any that matched the idea in my head exactly, I made up my own recipe.  Full disclosure:  the following recipe is a guess at the ingredients I've tasted in several enchilada casseroles at various potlucks through the years - I just don't have a recipe written down anywhere for it, so I made it up as I went today.

Layered Chicken Enchiladas

(I never call anything a casserole in my house, or my husband and children start picking at it and asking for the ingredient list.)

I started with 2 large chicken breasts, which I purchase in bulk at Costco.  They are inexpensive and huge.  I sprinkled them with salt, pepper, onion powder, cumin, and baked them in a glass dish for 45 minutes at 350 degrees.  I love the flavor of cumin with chicken or pork, but a little goes a long way, so I only sprinkle this spice on one side of the chicken.  I use onion powder because my husband doesn't like onions and has brainwashed my kids into thinking they don't like onions either.  

 I put the lid on these breasts and let them rest a few minutes before shredding the meat.  

The other ingredients are:
1 large can of green chili enchilada sauce
3 C of shredded cheese (cheddar, jack, colby - any kind will do, but I had monterey jack in the fridge, so that's what I used today)
1 C sour cream
1 dozen corn tortillas (raw - uncooked, unfried, because you don't have to worry about them tearing when you roll them up)
Pam cooking spray

I sprayed my 9x13 glass baking dish, and set aside, leaving the oven heated at 350 degrees after chicken was brought out.

I then shredded the chicken with 2 forks, and mixed in the sour cream, 2 cups of the shredded cheese, and 1/2 cup of the green enchilada sauce.
Then I poured a little of the enchilada sauce on the bottom of the baking dish and began layering.  I dip each corn tortilla into the can of sauce (I'm lazy - I suppose you could pour the sauce out into a shallow bowl and dip the tortillas in) and lay them down, overlapping a little at the bottom.  It's o.k. if they tear, in fact you may need to tear a few to fill in the corners and odd spots.

Then I spread half of the chicken mixture evenly over the tortillas.
And, then repeat.  After you've got the third layer of tortillas down, pour the remaining sauce evenly, over the top.  Lastly, sprinkle the remaining cup of cheese over the top and put dish into the preheated oven to bake about 30 minutes.
My family loved it, and ate it up with some sticky white rice and pinto beans.  
It cuts cleanly, and is not runny, but not totally firm either.  I was happy how this turned out, and am glad I didn't use any soup, as some of the recipes I looked at this morning called for.  For those of you that like a little spicier dish, I would suggest using pepper jack cheese.  I imagine that would be yummy.  So, please give this dish a try.  Just don't call it a casserole.

Tuesday, January 8, 2013

We've got eggs...

My husband and I went to Costco for our monthly "big" shopping trip last week.  Our monthly list rarely changes...toilet paper, dog food, meat, bread, sports drinks, coffee, sugar, and eggs are always on the list.  We actually enjoy going to Costco together.  We stop at the tasting stations, look at the new furniture or gadgets displayed in the middle of the store, argue over whether we need yet another, larger t.v.....

I usually have the list and lead the way, with my husband following along with the cart, picking up the items as we go.  We have a routine, which is pretty smooth, until we get to the check stand.  I like to get all of the items up on the belt/counter, in the order I want them packed back into the cart.  My husband takes only the top layer off, and leaves everything else in the cart, saying they can scan it while it's in there.  He will even put the bread up on the belt first!  (you know that's gonna get smashed in the packing of the cart.)  So, sometimes, for my own sanity and the preservation of our marriage, I have to look away while he is unloading the cart.

So, I guess I'm partly to blame for the fact that we came home with 120 eggs!  Yes, 10 dozen eggs!  My husband inadvertently picked up two of the large flats of eggs, and because he didn't take them out of the cart, but instead left them in there to be scanned, he didn't notice.  I did not notice either, because I was trying to ignore the fact he was leaving so much in the cart to be scanned.

What do you do with 120 eggs??  My husband suggested I start baking.  I looked up custard recipes and started checking my cupboards.  I also boiled some eggs to make egg salad with for the kids' lunches.  Then I ran across an idea on Pinterest....baked eggs.  I tried it and think you all should too:)

Baked eggs

The idea is to bake the eggs in a muffin tin, thereby ending up with perfectly round eggs that can be used for breakfast sandwiches.  

I sprayed Pam in my muffin tin, and cracked an egg into each well.


The directions said to bake the eggs in the oven at 350 degrees for 25 - 30 minutes.  I set my timer for 25 minutes, and could smell the eggs baking just before the timer went off, but did not take them out of the oven at that time, because when I looked at them, they still looked raw in the center yolk part.  So, I set the timer for 5 more minutes.  After 30 minutes the yolks still looked too yellow, but the edges looked a little dry and lacey.


I let them cool before trying one.  They were over done!  The bright yellow yolk, and shiny surface fooled me.  The top, thin layer had gotten hard, or plastic feeling, so I cut that thin layer off.  The egg tasted good.  We've eaten them with ham, on a thin bagel, and in a ham and egg sandwich.

We put them in a ziplock bag and kept them in the refrigerator because we planned on eating them all within a few days.  The pinner says they can also be frozen.

I will definitely do this again, although I plan on double checking the cart next time.